The contact us feature on this blog doesn't seem to be working so it's best to click on to this contact us address connected with the converseconserve website, for those who are interested. The cost of the classes will be around $12 per hour per person, and the workshops will probably run over 4-5 hours on a Saturday, so we will try to keep the cost to about $60 per person. The aim of the class is for participants to go away with the basics of building a small roof garden, the materials required, where to buy them, and also a step by step approach to practicing building a green roof. The classes will probably be held in Doncaster East, Melbourne.
The trick with building a green roof is to ensure that you build on to a small surface which no one (dear to you!) is going to be sleeping under, owing to the high chance of leakage! Then once you have constructed your first impermeable roofing layer, and tested it out for water-tightness, perhaps have more than one go at it, and only then consider retrofitting a roof which is intended for human habitation. The intention of these workshops is to get people familiar with the basics of building a practice green roof.
It's a lot of fun, and in fact the one below only cost around $100 including all materials, but we took care of the labour ourselves. One tip is to consider creating your first small green roof on a low-lying/ fairly ordinary looking structure where the roof will be visible so you can pretty it up with plants.
This blog comes with a serious warning! Before you can even think of building a green roof on to an existing dwelling in Melbourne, the roof will need to be retrofitted to bear the weight of the media plus equipped with extremely effective waterproofing layers normally constructed by professionals. Therefore beginners are advised to start with a smaller outdoor structure - and in my case my first green roof was built on to a shed, or another option would be to create a green roof over a sturdy garage. Here are some photos from a green roof which we created on the chicken shed, planted up with a variety of sedums, which are ideal for green roof planting in Australia.
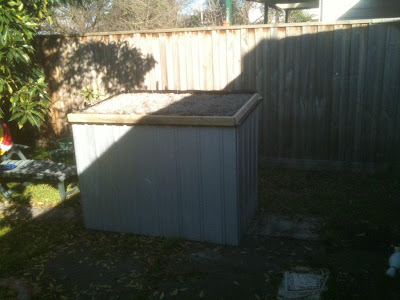
This is how two layers looked: the frame encasing the waterproofing layer and drainage layer.
Here is the green roof with the substrate added on top. Then the next photos show us planting up the green roof and shows you a close-up of the sub-strate (consisting of scoria, sand and organic matter).


No comments:
Post a Comment